



Hey there! As a supplier of Trailer Mounted Pumps, I often get asked about maintenance and replacement of parts. One common question is how to replace the impeller of a trailer mounted pump. In this blog, I'll walk you through the process step by step.
First off, let's understand why you might need to replace the impeller. Over time, the impeller can wear out due to constant use, debris in the water being pumped, or just normal wear and tear. A worn - out impeller can lead to reduced pump efficiency, lower flow rates, and even complete pump failure. So, it's important to keep an eye on its condition and replace it when necessary.
Step 1: Gather Your Tools and Materials
Before you start, make sure you have all the tools and materials you need. You'll typically need a set of wrenches, a screwdriver, a puller (to remove the impeller), a new impeller that's compatible with your trailer mounted pump, and some lubricant. It's also a good idea to have some safety gear like gloves and safety glasses.
Step 2: Prepare the Pump
Safety first! Make sure the pump is turned off and disconnected from any power source. This could be an electrical connection or a fuel supply if it's a gas - powered pump. You also need to relieve any pressure in the pump system. This might involve opening some valves or drains to let the water out.
Step 3: Remove the Pump Cover
Locate the pump cover. This is usually held in place by a series of bolts or screws. Use your wrench or screwdriver to remove these fasteners. Once they're all out, carefully lift off the pump cover. Be careful not to damage any gaskets or seals that are between the cover and the pump body. You might want to set the cover aside in a clean place where it won't get scratched or damaged.
Step 4: Access the Impeller
With the pump cover off, you should now be able to see the impeller. The impeller is usually attached to the pump shaft. Before you try to remove it, take a good look at how it's positioned and how it's attached. Some impellers are held on with a key or a set screw, while others might be press - fit onto the shaft.
Step 5: Remove the Impeller
If the impeller is held on with a set screw, use your screwdriver to loosen and remove the screw. If it's a press - fit impeller, you'll need to use a puller. A puller is a tool that grips the impeller and uses leverage to pull it off the shaft. Make sure you use the right size and type of puller for your impeller. Attach the puller to the impeller according to the manufacturer's instructions and then start turning the puller's screw to gradually pull the impeller off the shaft. This might take a bit of force, but be careful not to damage the shaft or the impeller housing.
Step 6: Inspect the Shaft and Housing
Once the impeller is off, take a close look at the pump shaft and the impeller housing. Check for any signs of damage, such as scratches, nicks, or corrosion. If the shaft is damaged, it might need to be repaired or replaced. The same goes for the impeller housing. If there's any debris or dirt in the housing, clean it out using a soft brush or a cloth.
Step 7: Install the New Impeller
Before installing the new impeller, apply a thin layer of lubricant to the pump shaft. This will make it easier to slide the impeller on and also help prevent corrosion. Carefully align the new impeller with the pump shaft. Make sure it's facing the right way and that any keys or set - screw holes line up correctly. If it's a press - fit impeller, you might need to use a hammer and a block of wood to gently tap it onto the shaft until it's fully seated. If it has a set screw, tighten the screw securely, but don't over - tighten it as this could damage the impeller or the shaft.
Step 8: Reassemble the Pump
Now that the new impeller is installed, it's time to put the pump back together. Replace the pump cover, making sure to align it properly with the pump body. Replace the bolts or screws and tighten them down. Make sure not to overtighten them, as this could damage the cover or the gaskets.
Step 9: Test the Pump
Once the pump is reassembled, reconnect it to the power source. Check all the connections to make sure they're secure. Slowly turn on the pump and let it run for a few minutes. Listen for any unusual noises or vibrations. Check the flow rate and pressure to make sure the pump is working properly. If everything seems okay, you're good to go!
Why Choose Our Trailer Mounted Pumps
At our company, we offer a wide range of Trailer Mounted Pumps. Our pumps are designed for high - performance and durability. They're built to handle tough jobs, whether it's draining a flooded basement or irrigating a large field.
We also have High - efficiency Mobile Pumping Stations that are perfect for large - scale applications. These pumping stations are easy to transport and set up, and they offer excellent efficiency and reliability.
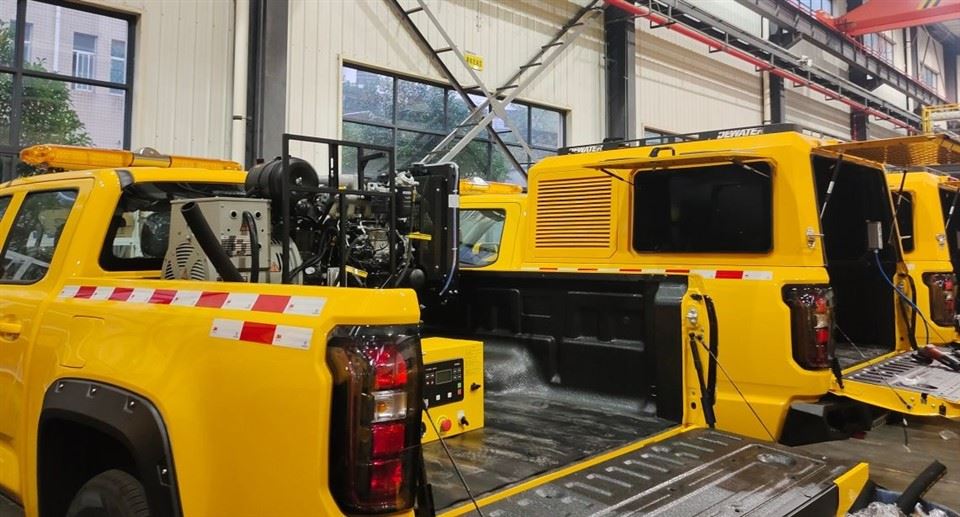
And if you need something more lightweight for quick rescue operations, our Light Duty Rescue Pump Trucks are a great choice. They're designed to be fast and efficient, making them ideal for emergency situations.
If you're in the market for a trailer mounted pump or any of our other pumping solutions, don't hesitate to reach out. We're here to help you find the right pump for your needs and can provide you with all the support and maintenance advice you need. Whether you're a professional contractor or a homeowner looking to solve a drainage problem, we've got you covered.

Conclusion
Replacing the impeller of a trailer mounted pump might seem like a daunting task, but if you follow these steps and take your time, it's definitely doable. Regular maintenance like this can extend the life of your pump and keep it running at its best. And if you ever need a new impeller or a whole new pump, remember that we're here as your trusted supplier.
References
- Pump Maintenance Handbook - A general guide on pump maintenance and repair.
- Manufacturer's Manual for Trailer Mounted Pumps - Specific instructions for your pump model.